How to Create an Amazon FBA Shipping Plan & Send Your First Shipment
Creating and sending your first shipment of inventory to Amazon can be a bit tricky—especially with Amazon’s recent changes to the shipping workflow, including the partnered carrier program and the new inventory placement options. These changes can make shipping more confusing and potentially costly if not done correctly. But don’t worry; I’m going to walk you through the process step-by-step, so you can create your first shipping plan without any hassles or mistakes.
I’ll also cover how to ship multiple products, deal with mixed or mismatched cartons, proper labeling, and other tips and tricks along the way.
The Basics: FBA vs. FBM
Before we dive in, let’s clarify when and why you need to ship inventory to Amazon. You only need to ship inventory if you plan to sell through Amazon FBA (Fulfillment by Amazon). This means Amazon will handle everything for you—storage, packing, shipping, customer service, and even returns and refunds.
If you plan to do FBM (Fulfillment by Merchant), where you handle all the shipping and fulfillment to customers yourself, you don’t need to ship anything to Amazon.
Pro Tip: I highly recommend FBA because it simplifies the selling process. Plus, your products will have the Prime badge on Amazon, which boosts sales since Prime members get free one- or two-day shipping.
Can You Drop Off Inventory to Amazon?
One common question is: “Can I drop off my inventory at a local Amazon warehouse?” Unfortunately, no. Amazon does not accept drop-offs. You’ll need to ship your products using a carrier like FedEx or UPS.
Step 1: Set Up Your Amazon Seller Account & Product Listing
Before you can create a shipping plan, you need:
- An Amazon Seller Account. If you don’t have one, sign up at sell.amazon.com.
- A Product Listing. You cannot create a shipping plan without a listing.
To create a product listing, go to Menu > Catalog > Add Products in Seller Central.
If you need help with these steps, check out my detailed videos linked in the description of my YouTube video.
Step 2: Start a Shipping Plan
Once your product listing is created, go to your Manage Inventory page. From there:
- Click on the dropdown next to your product and select Send/Replenish Inventory.
- Alternatively, go to Menu > Shipments > Send to Amazon.
Important: Is Your Product Set to FBA?
If you don’t see the Send/Replenish option, your product might not be set up for FBA. Switch to FBA by clicking Change to Fulfilled by Amazon.
Step 3: Complete Step 1 of the Shipping Plan
Select Products & Enter Details
- Select Products to Ship: You can select multiple products if you’re sending in more than one SKU.
- Origin Address: Enter the address where the shipment originates (usually your supplier’s address). A pro tip: To potentially reduce costs, use a California address. This trick can help you ship to warehouses near the port, cutting costs—but do this at your own risk as it’s against Amazon’s guidelines.
- Marketplace Destination: Choose where you’re sending the inventory (e.g., United States if selling in the US).
Create a Packing Template
You’ll need to create a Packing Template for your product, specifying how it’s packaged.
- Case-Packed vs. Single SKU Pallet:
- Case-Packed: If you’re shipping loose cartons that aren’t on a pallet.
- Single SKU Pallet: If you’re shipping palletized cartons, usually for larger shipments.
Understanding Case-Packed:
- Each carton must contain the same SKU and equal quantities.
- Example: If shipping 100 units of a red toothbrush, all cartons must have the same SKU and quantity (e.g., 100 units per carton).
Naming the Template: Use something like “Case Packed – 30 Units” for easy reference.
-
Box Details:
- Enter units per box, box dimensions, and weight. You can get this info from your supplier.
- Make sure to convert to inches and pounds if your supplier provides metric measurements.
-
Prep Category & Barcode:
- If you need Amazon to do any extra prep (like bubble-wrapping), you can select that option here.
- Barcode Type: Always choose Amazon Barcode (FNSKU) over the Manufacturer Barcode (UPC) to avoid inventory getting co-mingled with other sellers’ items.
-
Labeling:
- Choose Seller for who will label the products (your manufacturer usually).
- Amazon charges $0.55/unit to label for you, so it’s often cheaper to have your supplier do it.
Once done, Save your template.
Enter Units to Ship
- Enter the number of units you’re sending. For example, if you have 5 cartons of 30 units each, enter 150 units.
- Click Ready to Send, then Confirm and Continue.
Adding Extra Cartons
If you have a carton that doesn’t match the packing template (e.g., an extra carton of 10 units):
- Click More Inputs > Add a Packing Line.
- Choose Individual Units and enter details.
Step 4: Shipping Details – Step 2
Here’s where Amazon has made some big changes. You have two main options: Amazon Partnered Carrier or Non-Partnered Carrier.
Amazon Partnered Carrier Option
If you use Amazon’s partnered carriers, you’ll take advantage of Amazon’s shipping discounts. This is usually the recommended option.
New Inbound Placement Service Fees: You can choose how to split your shipment across multiple Amazon warehouses:
- More Warehouses = Lower Fees: Shipping to more warehouses lowers fees but increases shipping complexity.
- Fewer Warehouses = Higher Fees: Shipping to just 1 warehouse has a high fee but simplifies shipping.
Choose the Shipping Mode (e.g., Air or Sea) and set a ship date. Then click on Get Shipping Cost to view carrier options and costs.
Non-Partnered Carrier Option
If you want to arrange your own shipping through carriers like FedEx, UPS, or DHL:
- Set a ship date.
- Choose the shipping mode (Air, Ground, or Sea).
- Specify the delivery window—it’s critical to be as accurate as possible to maintain your account health.
Click Accept Charges and Confirm Shipping when done.
Step 5: Print Box Labels
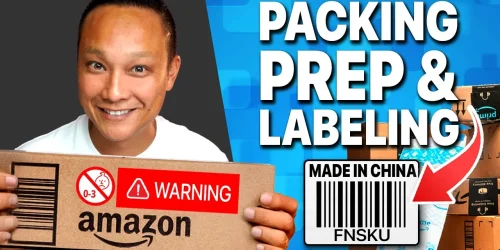
Download and print box labels for each shipping carton:
- Save as a PDF if you’re sending it to your supplier or freight forwarder.
- Ensure each carton has the correct label to match the shipment quantity.
Note: These labels are for Amazon’s internal use, to identify and track the shipment at their warehouse.
Shipping the Products
If you’re not handling the shipment, there’s nothing more to do. But if you are:
- Drop off your shipment at the carrier (UPS, FedEx, etc.).
- Or, arrange for the carrier to pick up the shipment (a pickup fee may apply).
Track & Monitor Your Shipment
Once your shipment is on the way:
- Track it in Seller Central under Shipments > Track Shipment.
- Enter the tracking details once available.
Your shipment will move through statuses like Shipped, Delivered, Checked In, and Received.
Processing can take anywhere from a few days to several weeks, so plan ahead, especially during peak seasons.
Two Common Mistakes to Avoid
- Storage Capacity Issues: If you get an error that your shipment exceeds your FBA capacity, delete any old shipping plans that are tying up storage.
- Mixing Up Unit & Carton Details: Always keep unit size/weight separate from carton size/weight to avoid massive errors in fees and storage calculations.


