Customize, Edit & Print Amazon FNSKU Barcode Labels for FREE
When you’re selling on Amazon, there are situations where you might want to customize and print barcode labels. Whether you’re handling the prepping and packaging yourself, or want to make your labels look more professional by customizing the size, color, text, or font, you can do it yourself for free. In this guide, I’ll walk you through how to customize and print Amazon FNSKU barcode labels, and even add things like country of origin and safety warnings to save some money.
When You Need Barcode Labels
First things first, let’s clarify when you actually need barcode labels on your products:
- FBM (Fulfillment by Merchant): If you’re handling all order fulfillment and shipping yourself, you don’t need to label your products.
- Wholesale or Arbitrage Sellers: If you’re selling wholesale or arbitrage products, these typically already have UPC barcodes, so no need to add anything.
- FBA (Fulfillment by Amazon): If you’re using FBA, where Amazon stores and ships your products, every single product must have a barcode label.
Types of Amazon Barcodes
Amazon uses barcodes to track inventory, and there are three main types of barcodes:

- Manufacturer Barcode (UPC): This is the universal barcode used worldwide on products in stores. It’s the same barcode scanned at checkout when you buy an item in a store.
- Amazon Barcode (FNSKU): This barcode is unique to Amazon and used to track inventory within Amazon’s fulfillment network.
- Transparency Barcode: For added security and authenticity, but not commonly used for most sellers.
Should You Use the UPC or the FNSKU Barcode?
If you’re selling private label products, always use the FNSKU barcode. Even if your product has a manufacturer UPC barcode, using the FNSKU barcode ensures your inventory is kept separate from other sellers’ products in Amazon’s warehouses. This helps avoid any mix-ups with other sellers’ products that may be of lower quality or have damaged packaging.
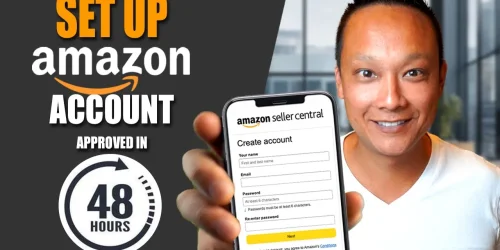
How to Get the FNSKU Barcode
To get the FNSKU barcode, you need to create a product listing in Amazon Seller Central. Once your listing is created, Amazon automatically generates the FNSKU for your product.
Steps to Get the FNSKU Barcode:
-
Create a Product Listing: If you haven’t already, create a new product listing.
-
Print the FNSKU: Go to the Manage Inventory page, find your product, and from the drop-down menu, click Print Item Labels. Choose the FNSKU barcode size you prefer.
If the FNSKU barcode isn’t available, it may mean your listing hasn’t updated yet, or you didn’t choose the FBA option when creating the listing. Make sure to set the Fulfillment Channel to Amazon FBA, and the barcode type to Amazon.
Important Tip:
- Make sure the FNSKU number starts with “X0.” This means it’s an Amazon barcode. If it starts with “B0,” it’s a manufacturer’s ASIN and will result in your items being co-mingled with other sellers’ products. You can change this setting by going to Settings > Fulfillment by Amazon > FBA Product Barcode Preference, and select Amazon Barcode.
How to Customize Your Barcode Labels
If you want to customize your barcode labels with additional information, such as the country of origin or safety warnings, you can easily do this for free using Canva.
Steps to Customize Your FNSKU Barcode:
-
Upload the FNSKU:
- Take a screenshot of the FNSKU label you downloaded from Amazon.
- Upload this image to Canva.
-
Resize and Edit:
- Drag the barcode onto a new canvas in Canva and resize it to fit your label or packaging design. Canva will show you the exact size, so you can make the barcode fit perfectly.
-
Add Custom Text:
- If you want to change the product title, add or change the font, or even move the FNSKU number, you can do that by cropping out unwanted text and replacing it with your custom text using Canva’s text tool.
-
Add Country of Origin and Safety Warnings:
- It’s often required by law to indicate the country of origin, such as “Made in China.” You can add this directly to the barcode label.
- For poly bags, if the bag has a 5-inch opening or larger, you need to include a suffocation warning. You can easily add this text or an icon next to your barcode.
-
Group and Save:
- Group all elements together in Canva and save the final label design as a PNG or PDF.
Pro Tip:
Make sure the barcode you created works! You can use the Amazon app on your phone to scan the barcode and verify it. If Amazon recognizes it, you’re good to go!
How to Print Your Custom Barcode Labels
Now that you’ve customized your FNSKU labels, you can easily print them yourself at home or have them printed by your supplier.
Steps to Print the Labels at Home:
- Buy Pre-made Sticker Labels: Avery makes a wide range of sticker label sizes that you can use for your FNSKU labels.
- Use Avery’s Free Online Printing Software: You can log in and upload your custom barcode design to print directly onto the labels. Align the barcode to fit the sticker size, and hit print!
If you’d prefer not to print the labels yourself, most suppliers will print and apply them for you—often for free or just a few cents per label.
Combining Labels to Save Money
One smart way to save on costs is to combine necessary labels onto one. Instead of buying separate labels for the country of origin and suffocation warnings, include them directly on the FNSKU label. You can even add other relevant safety icons or warnings as needed.
For example, many sellers print “Made in China” or the suffocation warning directly on the barcode label, streamlining the entire labeling process.