How to Send Your First Shipment to Amazon FBA in 2024 | Beginner Tutorial
Navigating Amazon’s updated shipping process can be daunting for new sellers. This comprehensive guide will walk you through creating your first shipping plan, dealing with common issues like mixed or mismatched cartons, and avoiding common mistakes. Let’s dive into making your first Amazon FBA shipment smooth and efficient.
Why Ship Inventory to Amazon?
Amazon’s Fulfillment by Amazon (FBA) service handles logistics, from storing inventory to customer service. If you use Fulfillment by Merchant (FBM), where you handle shipping to customers, you don’t need to ship anything to Amazon.
Key Benefits of FBA:
- Logistics Handling: Storage, picking, packing, shipping, and customer service.
- Returns Management: Amazon deals with returns and refunds.
Common Questions:
- Why not drop off inventory at a nearby warehouse?
- You must create a shipping plan and ship your inventory regardless of warehouse proximity.
Getting Started
Step 1: Amazon Seller Account
- Sign Up: Go to sell.amazon.com to register for a new seller account.
- Log In: Once approved, log into Seller Central.
Step 2: Create a Product Listing
- Navigate to
Menu > Catalog > Add Products. - Note: You must have a product listing to ship inventory.
Step 3: Creating a Shipping Plan
- Manage Inventory Page: Toggle to the new beta version if available.
- Start a New Shipping Plan:
- Find your product and select
Send/Replenish Inventory. - If the option is missing, ensure your listing is set to FBA.
- Find your product and select
Step 4: Select Products to Ship
- Choose Products:
- Default to the pre-selected SKU.
- For multiple products, select from the
All FBA SKUstab.
- Enter Origin Address:
- Preferably your supplier’s address.
- Pro Tip: Use a California address to potentially save on shipping costs (use at your own risk).
Step 5: Packing Details
- Packing Template:
- Select
Create New Packing Template. - Choose
Case Packedif shipping boxes, not pallets.
- Select
Case Packed Explained:
- Definition: Each box contains the same product (SKU) and quantity.
- Limit: 150 units per case.
- Template Details:
- Name the template descriptively (e.g., “Case Packed 60 Units”).
- Enter units per box, box dimensions, and weight accurately.
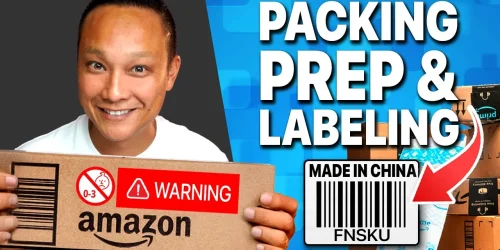
Step 6: Labeling and Preparation
- Barcode: Always use the Amazon barcode (FN SKU).
- Prep Category: Choose
No Prepif not needed. - Save and Continue.
Step 7: Confirm Packing Details
- Enter the quantity of boxes and units.
- If mixed units, use the
Add Packing Linefeature for additional cartons.
Step 8: Set Ship Date and Shipping Options
- Ship Date: Estimate accurately.
- Inbound Placement Service:
- Choose the best option based on cost and convenience.
- Default Shipping Option: Set in
Settings > Fulfillment by Amazon > Inbound Settings.
- Shipping Mode:
- Select
SPD (Small Parcel Delivery)for loose cartons. - Choose
LTLorFTLfor palletized shipments.
- Select
Step 9: Choose a Shipping Carrier
- Amazon Partnered Carrier: Utilize Amazon’s discount with UPS for domestic shipments.
- Non-Partnered Carrier: Choose for international shipments.
Step 10: Review and Confirm Shipments
- Review Shipments: Check warehouses, units, and delivery windows.
- Accept Charges: Confirm shipping costs and proceed.
Step 11: Print Box Labels
- Download or print shipping labels.
- Ensure correct labels go on corresponding cartons.
Common Issues and Pro Tips
- Label Placement:
- Amazon labels are for internal use.
- Arrange actual shipping through a carrier and use their labels as well.
- Shipping Carrier Coordination:
- Arrange shipping with carriers like FedEx, UPS, or DHL.
- Use Amazon’s partnered program if available for cost savings.
Tracking and Managing Shipments
- Enter Tracking Details: In Seller Central, under
Manage Shipments. - Shipment Status: Track progress from creation to delivery and processing.
Avoid Common Mistakes
- Capacity Limit Errors:
- Delete old, unused shipping plans to free up space.
- Unit vs. Carton Dimensions:
- Ensure accurate entry to avoid storage errors and inflated costs.
By following this detailed guide, you’ll be able to send your first shipment to Amazon FBA with confidence. For further information and links to additional resources, check out the video description and smash that like button for the YouTube algorithm!

Resources and Links: